Parex Acrylic thin coat help

Members online

Edge your bets

New Member
Hi all,

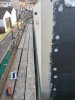
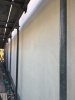
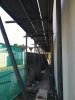
Just getting the oversills and reveal boards fixed and I'm almost ready to have a go at my first thin coat job...luckily it's my extension...

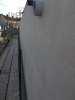
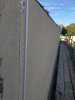
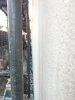
I was sure I'd read somewhere that you bead up then lay on the basecoat with the mesh in as you go, then I put a thin coat parex bead on today and was having a tough time bringing it out enough to ensure the nice 3/4mm proud corner I was aiming for...so I re-read the parex documents and one on line seems to imply that you put the base coat mesh on first, so is the correct sequence:

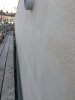
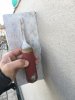
Lay the Maite the basecoat on, notch, bed mesh in, wrapping it around all the corners, then bed the corner beads on that, then presumably base coat finally over that to cover everything, flatten in and smooth off?

Using Maite basecoat on EPS, 1.5mm DPR Acrylic top coat afterwards.

Experience with S + C, some lime work, all internal flat wall plastering.

Thanks!
 
When applying the maite and mesh around the corner make sure is tide as possible.You can either use the excess maite to stick the corner or apply some and stick the corner.
 
When applying the maite and mesh around the corner make sure is tide as possible.You can either use the excess maite to stick the corner or apply some and stick the corner.
If I understand right, you saying, when applying maite and mesh around the corner make it as tight, or as tidy...both sound like a good idea : ) then us the excess maite or apply more to stick the corner bead on, bang it straight with a long straight edge...longest I've got is 50mm aluminium box at 2.5m
 
If I understand right, you saying, when applying maite and mesh around the corner make it as tight, or as tidy...both sound like a good idea : ) then us the excess maite or apply more to stick the corner bead on, bang it straight with a long straight edge...longest I've got is 50mm aluminium box at 2.5m
Yes, I mean push the mesh back so you are left more with maite , which will give you better chances of levelling and setting the corners. Maite is very slow setter. Bare that in mind when you do horizontal corners- too much gear and it will sag or fall off.
 
Yes, I mean push the mesh back so you are left more with maite , which will give you better chances of levelling and setting the corners. Maite is very slow setter. Bare that in mind when you do horizontal corners- too much gear and it will sag or fall off.
Thanks!

Yea I kind of got that when I put the 25mm EPS head on a 350mm window reveal, put the jambs on and it was starting to sag after an hour! Thin adhesive layer too...propped it in time though. It's funny stuff...drags after not long, but is a slow setter...dries nice n hard though.
 
Yes, I mean push the mesh back so you are left more with maite , which will give you better chances of levelling and setting the corners. Maite is very slow setter. Bare that in mind when you do horizontal corners- too much gear and it will sag or fall off.
How do finish it pal ready for top coat
 
Thanks!

Yea I kind of got that when I put the 25mm EPS head on a 350mm window reveal, put the jambs on and it was starting to sag after an hour! Thin adhesive layer too...propped it in time though. It's funny stuff...drags after not long, but is a slow setter...dries nice n hard though.
Use some nails to keep,it in place. Remove after is set.
 
Not at all, it works actually brilliant- no dragging, slumping or tearing . What’s your method?
 
We apply a coat and inbed mesh spat flat and let it pick up , then apply a tight second coat and finish as we go !
How you sponge finishing yours
 
We apply a coat and inbed mesh spat flat and let it pick up , then apply a tight second coat and finish as we go !
How you sponge finishing yours
Finish as you go was my first way.Then started with moisten the surface and trowel to avoid dragging and tearing, but found the sponge best- flatten as much as you can the second coat, don’t bother about the lines. Let it go off a bit more than usual and sponge it, if you hit it too early , sponge it twice and the finish is ready for top coat. If you are demanding after the first sponge let it pick and go over with trowel or spat. You might have some lines left from the sponge, which actually doesn’t matter, but you’ll end up with the flattest surface possible.
 
Finish as you go was my first Utd way.Then started with moisten the surface and trowel to avoid dragging and tearing, but found the sponge best- flatten as much as you can the second coat, don’t bother about the lines. Let it go off a bit more than usual and sponge it, if you hit it too early , sponge it twice and the finish is ready for top coat. If you are demanding after the first sponge let it pick and go over with trowel or spat. You might have some lines left from the sponge, which actually doesn’t matter, but you’ll end up with the flattest surface possible.
Mate with that post you know your matie fella we get it down very well with the spat and like you say can always drop back with sponge on any lines ! Do you 2nd coat Next day and sponge
 
Mate with that post you know your matie fella we get it down very well with the spat and like you say can always drop back with sponge on any lines ! Do you 2nd coat Next day and sponge
That’s funny what you said! There are two products I actually hate with no limits-multi and maite! The reason for that- lost big money with both, but I f**k**g cracked it at the end. And the mistake were done not following the normal methods as you can’t really make your money on site, so I had to come up with something else. You can second coat it next day , but do not do that in the cold months! Although it has 50% more polymers than any other product and it sticks like s**t to blanket....... I found out the slow setting time is not something you can ignore.Best wet on wet tbh .
 
Use some nails to keep,it in place. Remove after is set.
Yea I wondered about that but its 150mm thick eps on the face so I couldn’t think of much that would fix to it...the other 50mm at the back of the reveal is lintel!

Great info on finishing...
 
Thanks for the help guys, Lox especially, appreciated that call...

Got some beads on today, had to get a bifold door in over and past the scaff which was hairy, then just had time to pop a small side on...my practice side... put it on too thick but had to to make up for a mistake I’d made putting reinforcement mesh on before the main basecoat : ) I knew as soon as I’d done it it was a dumb move : ) anyway good to get a feel for it, know it’s limitations!
 
Just gonna put an update here in case others are Matie Virgins...

First wall: had too much builing out to do, should have dubbed out.
Second wall: put 1st coat on thinner as didn’t need building out and am getting about 7m out of a bag!, bedded mesh in, seemed nice n flat off the spat, then 2nd coated about 2mm thick... struggled to get finish off the spat...going round scaff poles which are 6” from the surface.
Third and Fourth walls put first coat on thicker , 6mm notch (the only one I got which is stainless) but not taking too much off, spatter up lovely, just covered mesh, let pick up for an hour of so in shade and second coated... still so hard to get finish off the spat...except where clean spat run.

I think we need to put it on a little thicker still then 8mm notch (sure I read that somewhere) then just spat the mesh in fairly firm and make sure the mesh is nicely covered. No second coat, less pissing about afterwards trying to bring it back when it’s picked up nicely!

Questions:
What are the things to show up through top coat? Ridges obviously, small misses/hollows?

When going up to stop bead/ expansion bead both 6mm, would you leave it shy to allow for flush finish withtop coat or flush woth base coat...Architect reckons go over the expansion beads!
 
Finish flush up to your beads, with your base.
Nose less beads are that for a reason wet to wet angles.id say your going to thick a couple of mm per pass.
Anything will show through, even at dpr sand course at 1.8mm so your base has to be on the money otherwise it will look shite and patchy. Why have you got 6mm beads, 3 or 4 mm would be fine.
Why can't you just grind the end of the putlogs off if there to near.
 
The expansion beads were spec'd by the Parex guy...the stop beads are more like 4mm... The stop and expansion beads are meshless...I know the edge beads you cover fully...

I'll take some pics...it's a bit tricky to see from pictures though...but it might show enough...

If I remember correctly the spec says to have the mesh fairly close to the surface... if I have to put another couple of mm over the top I don't think I'll fit a 2n'd mesh in there...

If I'm going too thick, would you be 3 coating it, or do you think I've been given the wrong expansion beads...again a picture might be best : ) Bit dark now : )
 
Just read the Maite spec sheet again, says 6m2 from a 30kg bag...so not too far off at all...

I've moved all the scaff poles back as far as they'll go, its the vertical ones that suck...I've been passing the spat between hands behind the poles 6" away from the face!

Pictures to follow : )
 
These are the top lift

Pics 4 and 5 show the couple of misses...
 

Attachments

  • 7F371E6E-6571-4141-BDA6-7368FE0C305C.jpeg
    7F371E6E-6571-4141-BDA6-7368FE0C305C.jpeg
    2 MB · Views: 510
  • 71411C4E-E203-4163-92FD-73BA80BF9ED5.jpeg
    71411C4E-E203-4163-92FD-73BA80BF9ED5.jpeg
    1.5 MB · Views: 486
  • 2F18E62C-6321-4859-879E-DF16D1317534.jpeg
    2F18E62C-6321-4859-879E-DF16D1317534.jpeg
    1.5 MB · Views: 482
  • F82DF02D-4C63-48A8-AA29-77E246AB2138.jpeg
    F82DF02D-4C63-48A8-AA29-77E246AB2138.jpeg
    1.7 MB · Views: 503
  • 35783BB5-2A60-4FC2-B15F-69A969152A5F.jpeg
    35783BB5-2A60-4FC2-B15F-69A969152A5F.jpeg
    1.6 MB · Views: 464
  • B35EB60D-B9B5-45EE-BAAF-064D7C881C43.jpeg
    B35EB60D-B9B5-45EE-BAAF-064D7C881C43.jpeg
    1.5 MB · Views: 509
Couple more of the top lift exp bead detail

And a couple from the bottom lift.

Scaff is a pain but they said they couldn’t go into the lane really... plus would have been too far away for the blockwork...its 150mm eps.
 

Attachments

  • A87A06D0-6CF4-4F4F-8DFB-E7143B938D11.jpeg
    A87A06D0-6CF4-4F4F-8DFB-E7143B938D11.jpeg
    1.5 MB · Views: 534
  • 9CA31AEB-26CD-4BD2-A482-226F7DEFA649.jpeg
    9CA31AEB-26CD-4BD2-A482-226F7DEFA649.jpeg
    1.4 MB · Views: 459
  • 0B909B95-7A0B-45BC-B8DE-B7EE1D7D1ACE.jpeg
    0B909B95-7A0B-45BC-B8DE-B7EE1D7D1ACE.jpeg
    1.5 MB · Views: 458
  • FD039A0A-DC44-4870-AACC-8810FF6586BE.jpeg
    FD039A0A-DC44-4870-AACC-8810FF6586BE.jpeg
    1.2 MB · Views: 425
  • 42384AE4-0042-4CFE-B083-A1CAA3513D58.jpeg
    42384AE4-0042-4CFE-B083-A1CAA3513D58.jpeg
    1.3 MB · Views: 446
  • B045D8D7-C33B-4059-AD32-41D4257646CB.jpeg
    B045D8D7-C33B-4059-AD32-41D4257646CB.jpeg
    1.6 MB · Views: 435
Take this as constructive criticism and not a personal insult,
It looks a mess, you've used the wrong expansion joint for a start, it's not a thin coat bead, that's why your having to build it up.
is there a break behind the insulation. For it?
Whst are you doing with your plastic finishing float in the picture?
You can't tell how even you've got it from the pics but it needs to be perfectly flat to receive the top coat.
It's a minimum 3 man job to top coat that it's a big panel other wise your going to get caught out with it, with not keeping your wet edge.
I'm all for having a go at stuff, but in my opion tacking a job like that is short sighted.that's a big practice area, and dpr is £100 a pale, cocking it ups going to cost you.
 
Thanks Owls for the thoughts!

The Parex guy spec’d the materials but something must have been misunderstood by the merchant as they know exactly what we’re using and are a parex stockist...thats a bit frustrating.

Ah I just put me trowel on the wall to show the misses behind, it’s hard to see how flat anything is with pictures...

The expansion joint is continuous through the structure, including eps, celcons, pb and skim.

Do you top coat over the expansion beads?
 
Personally I think is ok for top coating. Pictures never can don100% justice, but looking at it I think you can overcome the uneven, here and there, surface, patches and the misses .
 
Cool,

I spoke to a Parex guy who did say you can do a real sloppy mix over the top to try to make it better...he did say that the 6mm expansion beads were correct and that you can either basecoat flush, or the finish thickness back from the bead edge. If you base coat flush you have to ensure the finish coat isn't continuous so you need to cut back some to see the neoprene or whatever bit in the middle of the exp. bead.

I think I'll have a go at skimming on top of one to see if we can get it ideal.

The pictures may show the initial spat lines that were flattened in once it had picked right up...
 
Oh yea you guys probably alteady know this but he said if you try to build out the dpr top coat any more than the tight aggregate thickness, it’ll crack like cow pat!
 
Top