Skimcoat over gypsum coving query

Annker

New Member
I'm working on a refurb job where the existing wall to ceiling junctions had a curved transition.
Imagine a simple radius 4" curve similar to coving but all (lime) plastered in, so no margin/step as you would have where gypsum coving is installed after the walls and ceilings have been finished.

Anyway the condition of the old plaster, along with wall chases, room remodelling, etc has meant that I have hacked of the old plaster back to brickwork, pulled the ceilings down and will be doing all new float & set, boarding and skim.

However the homeowner wants to replicate the original curved section in the new finish plastering.
I'm not sure what is the best way to achieve this but one idea I have is to install gypsum coving at boarding/float & set level so to set the step on the coving back and then skim over the walls, coving and ceiling in one pass.

Has anyone done this before?
As in will gypsum paper faced coving accept skimcoat, I am imagining that being paper faced it is the same as skiming over boards?

The other challenge will be that as their wont be any profile break from wall to over coving to ceiling and back down the other side the sets will be quite a large m2!
f**k that
 
I'm working on a refurb job where the existing wall to ceiling junctions had a curved transition.
Imagine a simple radius 4" curve similar to coving but all (lime) plastered in, so no margin/step as you would have where gypsum coving is installed after the walls and ceilings have been finished.

Anyway the condition of the old plaster, along with wall chases, room remodelling, etc has meant that I have hacked of the old plaster back to brickwork, pulled the ceilings down and will be doing all new float & set, boarding and skim.

However the homeowner wants to replicate the original curved section in the new finish plastering.
I'm not sure what is the best way to achieve this but one idea I have is to install gypsum coving at boarding/float & set level so to set the step on the coving back and then skim over the walls, coving and ceiling in one pass.

Has anyone done this before?
As in will gypsum paper faced coving accept skimcoat, I am imagining that being paper faced it is the same as skiming over boards?

The other challenge will be that as their wont be any profile break from wall to over coving to ceiling and back down the other side the sets will be quite a large m2!
On another possibly more helpful note, why don't you set the coving 2mm proud of the boarded walls and ceiling and just skim up to the edge of it flush? Will achieve the same finish when it's all painted?
Although may hairline crack along the edges I suppose
 
I'm working on a refurb job where the existing wall to ceiling junctions had a curved transition.
Imagine a simple radius 4" curve similar to coving but all (lime) plastered in, so no margin/step as you would have where gypsum coving is installed after the walls and ceilings have been finished.

Anyway the condition of the old plaster, along with wall chases, room remodelling, etc has meant that I have hacked of the old plaster back to brickwork, pulled the ceilings down and will be doing all new float & set, boarding and skim.

However the homeowner wants to replicate the original curved section in the new finish plastering.
I'm not sure what is the best way to achieve this but one idea I have is to install gypsum coving at boarding/float & set level so to set the step on the coving back and then skim over the walls, coving and ceiling in one pass.

Has anyone done this before?
As in will gypsum paper faced coving accept skimcoat, I am imagining that being paper faced it is the same as skiming over boards?

The other challenge will be that as their wont be any profile break from wall to over coving to ceiling and back down the other side the sets will be quite a large m2!
Go for it, sounds like a good challenge.
 
Pack coving out so the lip is equal to the thickness of your floating coat.
Scrim where they meet and Bob's your uncle.
 
Dot and Dab strips of plasterboard to turn the ceiling/wall joints into 2 45 angles instead a 90... Dub out as required with. Bonding once set, skim.


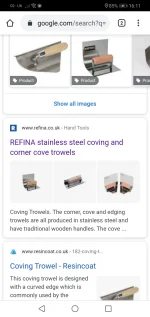
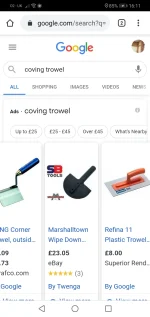
Or,. I belive they do a special trowel to form curves?

Set up. Batons and build up with. Bonding l.
 

Attachments

  • Skimcoat over gypsum coving query
    Screenshot_20201106-161140.jpg
    265.8 KB · Views: 214
  • Skimcoat over gypsum coving query
    Screenshot_20201106-161116.jpg
    252.7 KB · Views: 192
@ Annker - you've been big enough to say you don't know and ask for answers, fair enough.
I'm not having a knock but what training have you had, how did you get to what you do now?
Courses should teach this.
 
@ Annker - you've been big enough to say you don't know and ask for answers, fair enough.
I'm not having a knock but what training have you had, how did you get to what you do now?
Courses should teach this.
There's more than one way to get into the trade mate. I've been at this for 39 years now and have never had any formal training and nor did my old man or any of his brothers.
 
I'm working on a refurb job where the existing wall to ceiling junctions had a curved transition.
Imagine a simple radius 4" curve similar to coving but all (lime) plastered in, so no margin/step as you would have where gypsum coving is installed after the walls and ceilings have been finished.

Anyway the condition of the old plaster, along with wall chases, room remodelling, etc has meant that I have hacked of the old plaster back to brickwork, pulled the ceilings down and will be doing all new float & set, boarding and skim.

However the homeowner wants to replicate the original curved section in the new finish plastering.
I'm not sure what is the best way to achieve this but one idea I have is to install gypsum coving at boarding/float & set level so to set the step on the coving back and then skim over the walls, coving and ceiling in one pass.

Has anyone done this before?
As in will gypsum paper faced coving accept skimcoat, I am imagining that being paper faced it is the same as skiming over boards?

The other challenge will be that as their wont be any profile break from wall to over coving to ceiling and back down the other side the sets will be quite a large m2!
If the sets are to large for you, you need to feather out on one side and then feather in to it on the next set to minimise dry joint issues. You also need to do both sets on the same day to minimise the dry joint issues.
Tape up all your joints
Float your walls
Form your radius using same material as your floating coat. You can form the radius with one of the tools in the links in this thread or just use the edge of a plastic plate or lid from a tub of paint.
Don't know what level of trade your at so, if floating and forming radius takes you a day don't panic. Apply PVA next day if required and, start skimming say, from centre line of ceiling down to skirting line on one wall then, repeat.

This is one method of doing it, others will have different methods. If other methods are offered look at them and choose which one suits your skill level and working practices.
 
There's more than one way to get into the trade mate. I've been at this for 39 years now and have never had any formal training and nor did my old man or any of his brothers.
Absolutely true Andy, and in the past that's probably how most got into the business. I'm not knocking him, I'm just curious. It seems that now NVQ's and traing etc are becoming more common to get your site ticket. Curved radius's should be taught, but I reckon the new "Skimming Technicians" courses approved by BG will struggle with anything not at right angles, including reveals.
 
Absolutely true Andy, and in the past that's probably how most got into the business. I'm not knocking him, I'm just curious. It seems that now NVQ's and traing etc are becoming more common to get your site ticket. Curved radius's should be taught, but I reckon the new "Skimming Technicians" courses approved by BG will struggle with anything not at right angles, including reveals.
Tbh I doubt that would be taught. I've been plastering 15 years + and never needed to do it
 
Thanks all, great to have so many responses!

To answer some of your questions.
I am not a plasterer. I'm the builder on the job, actually a carpenter by trade. By asking here I'm hope to learn what ways exist to tackle this detail so I can be better informed when the plaster contractors move on site.
The homeowner was extremely fond of this curved detail and him "giving the green light" to hacking back to brickwork etc was conditional on we being able to reproduce this detail in the new plasterwork so I'm anxious to get it right.

Hopefully I have been over thinking it, but I'd rather do that than be complacent and have lumps of plaster hanging from the ceiling in a months time.

So perhaps dubbing out the curve in bonding and skimming over is the correct method.
Nice that you've got such great confidence in your plasterer. He'll be thrilled if he sees this.
 
Nice that you've got such great confidence in your plasterer. He'll be thrilled if he sees this.
Not sure what to make of your comment.
On my projects I like to get involved in the detail and the sub contractors appreciate that engagement. It achieves good results for us anyhow.
 
They may appear appreciative to you but they will hate it, the con artists and chancers will know their out of their depth, and the good ones won't appreciate you telling them how to do it.
Suggest you write to them and ask them how they propose to do this, in writing/sketches 'cos the client will retain monies and go batcbatshit if it's not right. But.. you might find some spreads seem melt away...
 
Back
Top