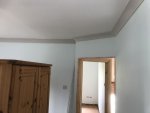
Awkward gyprock coving angles!

There are only 4 mitres. When you cut an internal on the other side of saw it's an external.
As for upside down, that is the correct way (oh god it's so wrong in my head) available at B@Q. Here it is. This is upside down to me

View attachment 41798
Don't think that would be any good for gyproc cornice, not that much of a bother.
 
There are only 4 mitres. When you cut an internal on the other side of saw it's an external.
As for upside down, that is the correct way (oh god it's so wrong in my head) available at B@Q. Here it is. This is upside down to me

View attachment 41798
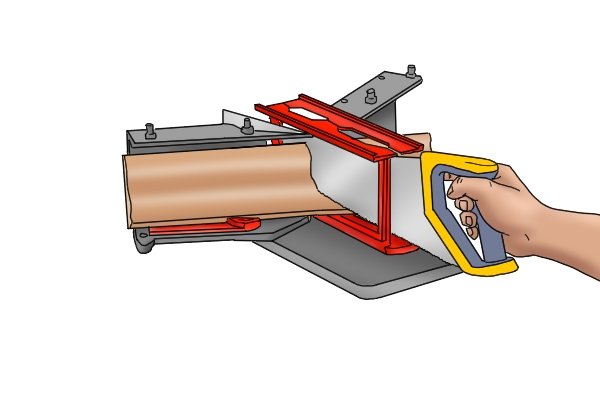
if you are using a normal mitre box put on a trestle/ workbench whatever /to cut a cove shape the cove u are cutting needs to be upside down as u look at it so the easy way to remember this is when in the box always have the wall edge in front of your balls/ie the wall to your ball say that as u do it it wont work for @JessThePlasterer but that's life
 
The Last time I did coving the walls and ceiling where that far out I was using a Stanley knife to shave back on the angles by hand to get them to fit lol. Iv no pictures lol
 
There are only 4 mitres. When you cut an internal on the other side of saw it's an external.
As for upside down, that is the correct way (oh god it's so wrong in my head) available at B@Q. Here it is. This is upside down to me

View attachment 41798

That's not the magic mitre mate.

The magic mitre is Adjustable to cut any angle after using the measuring guide that you then transfer to the box etc.
 
Has anyone thought of a laser and pencil top bottom and middle points , I might of mentioned it earlier but I've got a touch of dementia
 
That's not the magic mitre mate.

The magic mitre is Adjustable to cut any angle after using the measuring guide that you then transfer to the box etc.
Yeah. I got a magic mitre block

Got the wondertex tool to.
And several I've made from wood the old fashioned type. That one I linked to from B&Q is the strange. Upside down to me but correct way to fit. Go have a look. Odd as hell. You cut from the back of cove to the front.

I used to have a lorry turn at home with 50+ boxes every 3 months. I put 100s of boxes up over the years but it's died off? Put about 5 boxes up this year. Crazy..
 
The
Yeah. I got a magic mitre block

Got the wondertex tool to.
And several I've made from wood the old fashioned type. That one I linked to from B&Q is the strange. Upside down to me but correct way to fit. Go have a look. Odd as hell. You cut from the back of cove to the front.

I used to have a lorry turn at home with 50+ boxes every 3 months. I put 100s of boxes up over the years but it's died off? Put about 5 boxes up this year. Crazy..

Tbf I dont think you can beat the metal triangles easiest to use.
 
Have you tried it before?
I live in the dark ages only just got a laser level , always used plumb line and water level and 3,4,5 lol
To get the centre line to set level in position
15740256394188210029957654854728.jpg
is
 
I haven’t done coving for a good while tbh,do the odd bit of repair work but it’s not as in demand as once was! s**t anyway like all aspects of plastering dogshit!!
 
  • Agree
Reactions: Djr
Would it work if you held up the cove to the angle and got another person to saw against the angle while in situ and do the other side after . Would they both match up ?
 
if you are using a normal mitre box put on a trestle/ workbench whatever /to cut a cove shape the cove u are cutting needs to be upside down as u look at it so the easy way to remember this is when in the box always have the wall edge in front of your balls/ie the wall to your ball say that as u do it it wont work for @JessThePlasterer but that's life
My maiden names Ball so I’m good thanks! :ROFLMAO:
 
firstly I think coving looks a bit shite.... unless it is big elaborate in a big house with high ceiling then yes... but for me it will always be a no

however.... @zombie.... @TonyM is your man :D he did a guide a few years ago...
 
I draw plan of the room and use £12 laser measure to quickly get the sizes. Scratch the surface and put ↑ where the cove bottom should be. Seal area. Go outside and cut all the cove, ready to fit the room.
Mix up cove adhesive (not wickes it's board adhesive)
Seal cut joints.
Blob joins so they are full of material as I go.
Use nails to support.
Sponge clean.
Use painters fine power filler to smooth off joints.

Used to put 5+ boxes up a day on site but got slower with age. Plus I'm all domestic now.
Was good money and used plastic cove box most of the time for 127mm cove.
Packed box for 100mm or 90mm with wood on bottom.
Draw lines on cove before you cut is best tip I can give.
Most try to fit an upside down external as an internal. That gives gap in middle. If you mark top and bottom and always place the bottom at the top when cutting it will help.
You have to cut upside down. Either you or the cove needs to be upside down when you cut. That's where it all goes wrong for some.
If you draw line on cove you can't see it as on underside when cutting, hence you need to turn upside down to see where to cut. Ah..you understand now
 
There is s curved metal mitre guide shown here specific to the sculptured cove. It's different to the standard one sold at Toolstation ect. Anyone seen for sale as I can't find it online. It's shown 2.35 in here. Thanks
 
It's just a matter of reversing it in your head, I usually get a couple of scrap bits and practice it till it sticks in my head.

f**k**g lab can't tell his left from his right or turn anything round in his head.

Left him to do some flooring and came back to a pile of cuts and f**k all done.

Gave him the mitre box and told him to get on with the trim. Came back and he'd cut all weird and wonderful shapes and put them together in the middle of the floor.

What you doing?
Leave me alone.
No, really. What are you doing? Have you cut all that so you can refer to it?
Yes.
f**k off Paul. Give me that saw and go and get your hammer. I'll cut you nail.
 
Back
Top