ChrispyUK
Well-Known Member
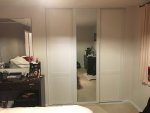
Got some sliding wardrobe doors to fit soon, and at mo, wardrobe has 2 hinged doors with about a foot of board above doors and archs around it. Need to modify opening and take out the PB straight to ceiling. Apart from ceilings, think walls are taped and jointed. If they were skimmed, Id probably carefully remove skim and plant angle beads on the corners each side of the doors, but no skim depth. Is the angle tape stuff any good/easy to use? Ta.
")