How to calculate your sq/m price?

I have always sold myself short when I was younger, and even though my work was good, it rarely lead to repeat business because I think people don't take you seriously if you don't make them pay. It's very paradoxical how pricing works, psychologically.
I think if you weigh up a job with tight margins and offer a really good price, because your not really happy with it yourself and there is not much profit in it and really you want more because deep down you know it warrants more, you come across as a dodgy rip off to the customer. Your better off doing that pricing thing, adding 50% and going for it with faux confidence and get viewed much better by the customer for it
 
Last edited:
I think if you weigh up a job with tight margins and offer a really good price, because your not really happy with it yourself and there is not much profit in it and really you want more because deep down you know it warrants more, you come across as a dodgy rip off to the customer. Your better off doing that pricing thing, adding 50% and going for it with faux confidence and get viewed better
Yeah I think I'm gonna have to agree with that. It's probably better giving them a high price with confidence. And if they think it's too much, you can propose a small cut in order to accommodate their budget. The price might still be too high, but at least now they feel as though you threw them a bone.

And then also there is a point to be made about being self-employed: when you have a job, all is well. But there are rough patches where it might be difficult to find that next job. So it's not really unfair to make your clients pay for the downtime because during the downtime, you're doing a lot of marketing work, which is also WORK.

I might actually factor in at least a month worth of downtime per year which is spent purely on marketing, looking for jobs. And if you divide those costs across all the jobs you do in a year, I think you're not ripping anyone off. It's just the nature of running a business. Client doesn't pay for just plastering; they pay for the service the company provides. And marketing costs are a part of that. Because without the marketing, your client wouldn't even have been able to find a plasterer in the first place.

So yeah... charging them for marketing is completely fair. Every company does it.
 
this is such a hard trade; not just physically, but also in terms of skill. The time it takes to become good at this is the same time it takes to study to become a doctor. And to make things even more challenging, if you're self-employed, you're tasked with doing your own marketing and looking for jobs when you have none, can be really stressing. It's only fair that clients pay you extra for that.

If they rather go for the polish crew or a subcontractor that does meterage, so be it. But they should also understand that the quality of the work might not be on par with someone who works for themselves and has pride in the work they deliver and a reputation to preserve.
 
Yeah I think I'm gonna have to agree with that. It's probably better giving them a high price with confidence. And if they think it's too much, you can propose a small cut in order to accommodate their budget. The price might still be too high, but at least now they feel as though you threw them a bone.

And then also there is a point to be made about being self-employed: when you have a job, all is well. But there are rough patches where it might be difficult to find that next job. So it's not really unfair to make your clients pay for the downtime because during the downtime, you're doing a lot of marketing work, which is also WORK.

I might actually factor in at least a month worth of downtime per year which is spent purely on marketing, looking for jobs. And if you divide those costs across all the jobs you do in a year, I think you're not ripping anyone off. It's just the nature of running a business. Client doesn't pay for just plastering; they pay for the service the company provides. And marketing costs are a part of that. Because without the marketing, your client wouldn't even have been able to find a plasterer in the first place.

So yeah... charging them for marketing is completely fair. Every company does it.
Just change enough so you can take a bird out mate, that's a good yardstick !
 
Last edited:
Just change enough so you can take a bird out mate, that's a good yard stick !
men with self respect don't pay for women anymore mate, times have changed. They wanted equality, they can have it.
My gf agrees btw: most women just want the good things about equality, none of the bad
 
men with self respect don't pay for women anymore mate, times have changed. They wanted equality, they can have it.
My gf agrees btw: most women just want the good things about equality, none of the bad
Ok , just so you can have a good life, is that better ?
 
Yeah I think I'm gonna have to agree with that. It's probably better giving them a high price with confidence. And if they think it's too much, you can propose a small cut in order to accommodate their budget. The price might still be too high, but at least now they feel as though you threw them a bone.

And then also there is a point to be made about being self-employed: when you have a job, all is well. But there are rough patches where it might be difficult to find that next job. So it's not really unfair to make your clients pay for the downtime because during the downtime, you're doing a lot of marketing work, which is also WORK.

I might actually factor in at least a month worth of downtime per year which is spent purely on marketing, looking for jobs. And if you divide those costs across all the jobs you do in a year, I think you're not ripping anyone off. It's just the nature of running a business. Client doesn't pay for just plastering; they pay for the service the company provides. And marketing costs are a part of that. Because without the marketing, your client wouldn't even have been able to find a plasterer in the first place.

So yeah... charging them for marketing is completely fair. Every company does it.
You can put whatever you like on a spreadsheet, pardon the pun, but that wont ever work in the real world, that is my point mate .
 
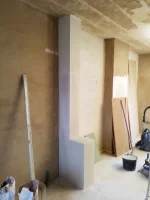
Little update

I took @Smudger1 's suggestion
Put screeds on it'll run straight then
and it has been a game changer. I also found the 'plasterer's bible' and the very same process is described therein (chapter: Floating and Scouring Course Stuff).
source: https://archive.org/details/plasteringplaind00mill

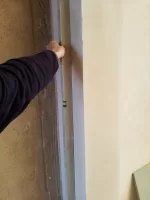
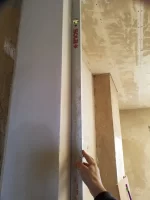
I've gotten some excellent results: plumb and flat walls within 1mm tolerance.
How to calculate your sq/m price?How to calculate your sq/m price?How to calculate your sq/m price?

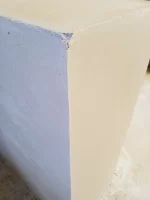
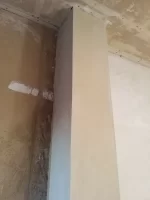
However, now there's the issue of dealing with the outside corners. Ideally, it would probably be best to use corner beads... but the problem is that I do not want to paint the plaster. I'd like to make lime plaster more accessible to regular people, so if people can save costs on painting, lime plaster can compete with gypsum. Anyway, this what my outside corner look like. Good in some places, but s**t in others and it's a pain in the neck to do freehand. There has to be a better way no? I tried looking the Plasterer's Bible for answers but they were pretty vague.

How to calculate your sq/m price?How to calculate your sq/m price?How to calculate your sq/m price?

So here's the thing: I can get my outside corners perfect during the float coat, absolutely bang on and it's pretty easy and quick. You simply screed the two surfaces, float them flat with the darby. At that stage, the plaster is a bit stiff so you can fill out the corners. Because your two perpendicular surfaces are bang on, you can simply float/scour the corners up using two hand floats (one float to protect/form the corner while scouring the other surface with the other float). This gets perfect corners very quickly. Because your two surfaces are plumb and flat already, you use them as a guide to form the corners. If your two surfaces are bang on, your corner will also be bang on.

But then for the skim coat, that's where I'm messing it up. I think I need an outside corner trowel to get this right. I don't see another way of doing it.

What do you guys think?
 
As Malc says, use an external trowel. Used to call it a Queenie.


Mine only comes out probably twice in a year now - on average.
Usually on things like arches and other false corners.

One of those tools that you think why the f**k am I carrying that.

Then one day, you need it and it's irreplaceable.
 
One of those tools that you think why the f**k am I carrying that.

Then one day, you need it and it's irreplaceable.
well I didn't even own one. Have got one for internals but never imagined I would need one for externals. At my old job we used to just make round corners freehand.

I've gotten a Queenie today though so I'll be testing it on Monday. Cheers for the advice lads
 
As Malc says, use an external trowel. Used to call it a Queenie.


Mine only comes out probably twice in a year now - on average.
Usually on things like arches and other false corners.

One of those tools that you think why the f**k am I carrying that.

Then one day, you need it and it's irreplaceable.
is it important to have a sharp edge on the corner trowel? The one I found in the local shop is a bit blunt
 
is it important to have a sharp edge on the corner trowel? The one I found in the local shop is a bit blunt
I prefer a pencil round external of the Manufactured ones. There were early ones that were home made out of a piece of copper.

With lime mortar I always used a wooden bullnose bead. We added Keanes cement plaster to the lime to give the angle extra strength.
A few years ago I plastered a water mill that was a listed building. The architect did not want to decorate the ceilings and walls. For these we used Luz soap flakes mixed to a paste that I could apply with a trowel , the next day I had to polish the areas with Lambs wool. The reason for this was when the areas got dirty warm water would remove the soap flakes then they could be taken back to the mortar.
so you do the perpendicular faces regularly in lime plaster without filling out the corners yet and then basically fill in the corners with hydraulic lime plaster?
I'm not sure about using a wooden bead because I'm afraid it might cause cracks
 
is it important to have a sharp edge on the corner trowel? The one I found in the local shop is a bit blunt
Get someone to make one for you. You can then choose the radius you want and he/she can also Polish the edge to make it glide easier.
It will cost more, but it's a tool you'll use a lot if your not wanting to use beads.
It might be worth getting a couple with different radius made up, as different people like different finishes.
 
Last edited:
Get someone to make one for you. You can then choose the radius you want and he/she can also Polish the edge to make it glide easier.
It will cost more, but it's a tool you'll use a lot if your not wanting to use beads.
It might be worth getting a couple with different radius made up, as different people like different finishes.
just tried out the one I got, it worked well enough but the radius is quite small. I'm also having a bit of trouble polishing without damaging the corners and have the corners blend in nice with the wall surface. Keeping the tool wet helps but it's tricky to get a seamless finish.

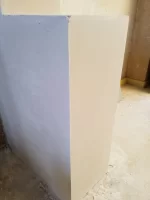
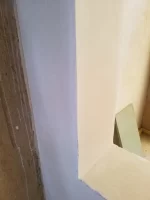
20250113_124010.webp20250113_123952.webp20250113_123934.webp

It seems like you have to keep both surfaces wet/green when forming the corner. If one side is set, I can't get a seamless finish as I can't feather it out because the finish plaster I'm using has very fine quartz sand in it. It's difficult to get a smooth finish with this material, but I like the look of the sand in the final finish...

I'm not satisfied with the work in the pictures but it was the first try. I'm going to re-do it, possibly experimenting with some better corner tools and figure out a strategy to keep the angle wet while still leaving myself enough time for the plaster stay wet so that I can properly trowel it up. The problem here is that I ran out of time. I scour the plaster and then immediately wet it and trowel it up. Then I'm still able to get enough fat to trowel it back into the wall and get a smooth finish. The problem here is that after scouring, I started working on the corner and the plaster dried out too much. So when I went to trowel it, it was too dry already and I wasn't able to get any fat on the trowel.
 
just tried out the one I got, it worked well enough but the radius is quite small. I'm also having a bit of trouble polishing without damaging the corners and have the corners blend in nice with the wall surface. Keeping the tool wet helps but it's tricky to get a seamless finish.

View attachment 80901View attachment 80902View attachment 80903

It seems like you have to keep both surfaces wet/green when forming the corner. If one side is set, I can't get a seamless finish as I can't feather it out because the finish plaster I'm using has very fine quartz sand in it. It's difficult to get a smooth finish with this material, but I like the look of the sand in the final finish...

I'm not satisfied with the work in the pictures but it was the first try. I'm going to re-do it, possibly experimenting with some better corner tools and figure out a strategy to keep the angle wet while still leaving myself enough time for the plaster stay wet so that I can properly trowel it up. The problem here is that I ran out of time. I scour the plaster and then immediately wet it and trowel it up. Then I'm still able to get enough fat to trowel it back into the wall and get a smooth finish. The problem here is that after scouring, I started working on the corner and the plaster dried out too much. So when I went to trowel it, it was too dry already and I wasn't able to get any fat on the trowel.
This is why angle beads were invented, and not long after most started to use them. quicker, easier and will take a little knock.
 
This is why angle beads were invented, and not long after most started to use them. quicker, easier and will take a little knock.
just had my second try; it went a lot better.
The trick seem to be to skim up to the corner. Then scour, and while scouring, making sure you push the gear towards the corner. The stuff will go past the corner itself. Then wet trowel and finish the surface.
After that, you cut off the excess: the bit of gear that sticks out past the corner, you just cut it off flush with the corner.

then you skim the second wall, same way as before. Cut off the excess gear after scouring. Wet trowel and immediately after finishing the wall, mist the corner with some water, take the Queenie and slide it down the corner a few times. Going slow and pushing a bit hard seems to do the trick. Since both wall surfaces are already quite firm after both having been troweled up, you don't really need to do much to the corners anymore. They're pretty much 75% there. Running the Queenie with a good amount of water at the end just delivers that final perfect shape and smoothness.

I do appreciate the convenience of corner beads... but the problem is that the corner itself shows through. So you're forced to paint. I'm not even sure if a lime based paint would adhere to the metal.

As said before, I'm trying to figure out a quick and easy 2 coat loam/lime system that doesn't need paint. Saving on the paint job would make lime float and set a lot more accessible to more people.
 
20250113_151824.webp20250113_151726.webp

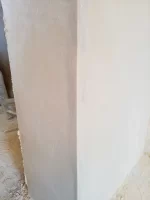
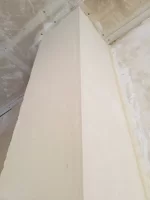
This is from the second try today. It's a lot better already and I think I'll be able to make it work. I will try to look for a better corner tool. A slightly bigger radius would be cool as well.
I'll also experiment with adding some hydraulic lime or portland cement to fill out the corners in the float coat. I'll also try adding floor screed glass fibers to it to reinforce the corners even more.

Will keep reporting on the experiments here
 
Why aren't you doing ceilings first if that's a finished product.
Also there's no scrim how are you going to stop the ceiling to wall cracking?
Looks a nice job but time consuming.
Not sure that fibres will stay flat when trying to do corner!
 
Last edited:
Back
Top